How to Assemble a USM Haller Replica: Steps for 2026

Sohnne Design Studio
August 26, 2026
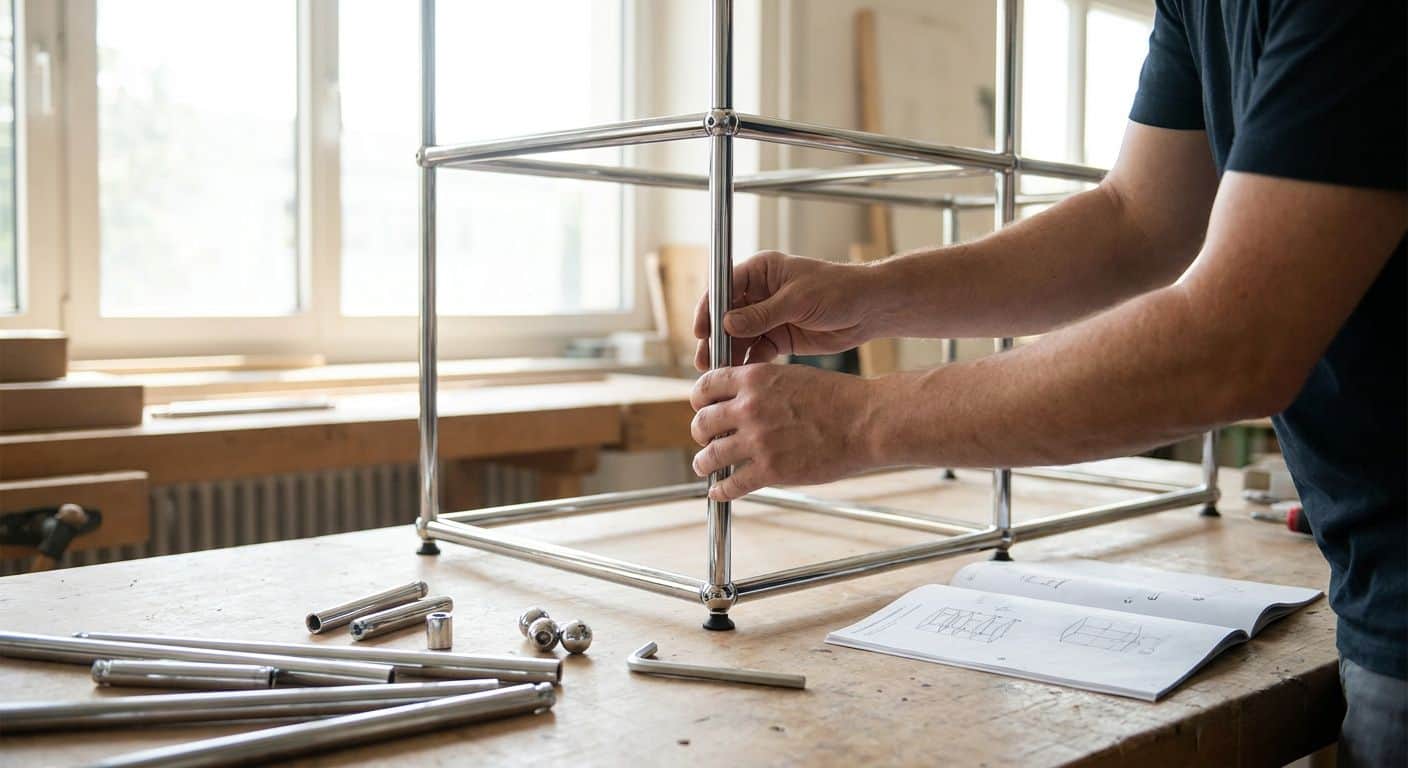
Assembling a USM Haller shelving replica comes down to three things: matching connectors to the right panel edges, tightening ball joints in the correct order, and leveling the frame before you load it. Get that sequence right and a two-bay unit goes from box to bookshelf in one sitting; get it wrong and you're re-threading stripped connectors.
TL;DR- Assemble a USM Haller shelving replica frame-first: connectors, then uprights, then panels, then shelves, in that order.
- Hand-tighten every ball joint before the hex key touches it; overtightening bends chrome tubes on 2026-made replicas the same way it did on originals.
- Level the frame against the wall before loading panels — USM Haller-style shelving has almost no flex tolerance once weighted.
- Sohnne’s Haller Shelving Replica ships with hex hardware included: Buy if you’re building solo, budget a second pair of hands for anything past two bays.
Why this matters
Most assembly complaints with modular chrome-and-panel shelving trace back to one mistake: building panels before the frame is square. Once a USM Haller shelving replica is loaded with books or ceramics, a racked frame stays racked — you can't nudge it straight after the fact without unloading every shelf.
The sizing and configuration guide covers which module widths fit which wall spans. This guide covers what happens after the boxes arrive: the actual build, in order, with the mistakes that cost people an afternoon in 2026.
What you'll need
- The shelving unit itself — connectors, tubes, panels, and shelf inserts, sorted by size before you start
- A hex key (usually included in the hardware bag — don't substitute a random Allen set, sizes vary between batches)
- A rubber mallet for seating panels without marking the finish
- A torpedo level, ideally 24 inches or longer
- A tape measure and a pencil for marking wall anchor points
- A moving blanket or old towel to lay the frame on while you work
- A second person for anything wider than a single bay — panels are light but awkward one-handed
Lay every part out on the floor before touching a single connector. USM Haller-style hardware ships in near-identical bags across bay sizes, and mixing up a corner connector with a straight one is the single most common reason people call an install "broken" before it's even started.
The steps
1. Sort and inventory every part
Group connectors by joint type (corner, T, straight, end cap), then group tubes and panels by length. This takes five minutes and prevents the most common stall point: reaching for a part halfway through a step and discovering it's the wrong one.
Common mistake: assuming all ball connectors are interchangeable. Corner and mid-run connectors look nearly identical but have a different number of ports.
2. Build the base frame flat on the floor
Lay the bottom tubes and connectors out flat, hand-tighten every joint, then measure both diagonals of the rectangle. Equal diagonals mean a square frame; a difference of more than a quarter inch means one corner isn't seated.
This is the step that determines whether panels snap in cleanly later. A frame that's slightly out of square will fight you at every subsequent step.
Common mistake: fully tightening joints before checking square. Hand-tight lets you nudge corners into alignment; a torqued joint won't move without loosening it again.
3. Raise the uprights and lock the base
Attach the vertical tubes to the base frame corners, standing the unit up with help if it's wider than roughly 30 inches. Check the base is still square once it's vertical — lifting a frame can twist it slightly.
Use the level here, not just your eye. A shelving replica that's off by a few degrees at the base amplifies that lean at the top shelf.
Common mistake: skipping the second square check after standing the frame up. Gravity and the weight of the tubes shift things more than people expect.
4. Attach side and back panels before shelves
Panels have a lip on one edge that seats into the frame channel — that edge goes in first, tilted slightly, then pressed flat with the mallet. Do the back panel first, then sides, working from bottom to top.
Installing panels before shelves keeps the frame rigid while you're still handling and adjusting it. Shelves go in last because they're the heaviest single component and the easiest to reposition on a stable frame.
Common mistake: forcing a panel in upside down. The lip only seats one direction; forcing it the wrong way flexes the panel edge and leaves a visible gap.
5. Set shelf height to the grid, not by eye
USM Haller-style connectors lock into fixed positions along the upright, spaced in even increments. Count connector holes rather than measuring with a tape, since the grid is what keeps every shelf level relative to the others.
Decide your shelf spacing before locking anything — books need roughly 10 to 12 inches of clearance, records need less, and a media console shelf usually wants more depth clearance in front. Load the intended items as a test before final tightening.
Common mistake: locking every shelf at even spacing without accounting for what's going on it. A shelf sized for paperbacks won't clear a stack of oversized art books.
6. Add a second bay by sharing the center upright
For multi-bay configurations, the shared upright between bays takes connectors from both sides. Build the second bay's frame the same way as the first, then join it to the shared upright before adding that bay's panels.
Check square on the combined unit, not just each bay individually — two individually square bays can still create a slight bow across the full width if the shared upright isn't perfectly vertical.
Common mistake: tightening the shared upright's connectors before both bays are aligned. Once torqued, that upright won't rotate to correct a bow.
7. Final tighten with the hex key
Go joint by joint with the hex key, snugging each one until it stops turning by hand pressure plus a small resistance — not until the key strains. Chrome tubes on any USM Haller-style system are thin-walled; overtightening deforms them rather than making the joint stronger.
Work top to bottom so any small shifts settle downward into joints you haven't finalized yet.
Common mistake: using body weight on the hex key. If a joint needs that much force, the ball isn't seated correctly — back it out and reseat it instead of forcing it.
8. Level, anchor, and load gradually
Run the level across the top and along each upright. Adjust leveling glides at the base for uneven flooring, then anchor to the wall if the unit is freestanding and over roughly 40 inches tall — standard practice for any modular shelving carrying real weight.
Load the heaviest items on the bottom two shelves first, then work upward. This settles the frame under real weight gradually instead of all at once.
Common mistake: loading the top shelf first because it's most visible. Top-heavy loading is the most common cause of a tip-over on unanchored units.
Shop the Haller Shelving Replica
Chrome connectors and powder-coated panels, sized to the original modular grid.
Shop SohnneTroubleshooting
Panel won't snap into the frame channel. Check orientation first — the lipped edge faces a specific direction and only seats one way. Forcing it in backward flexes the panel and leaves a visible gap along one side.
Frame racks or leans after standing it up. One or more corner connectors weren't fully seated before the frame was raised. Lay it back down, loosen the affected corner, reseat, and recheck diagonals before standing it up again.
A ball joint feels loose even after tightening. The threads are likely stripped from either over- or under-tightening during a prior pass. A stripped connector won't hold torque no matter how hard you turn the hex key — it needs replacing, not more force.
Shelf sags visibly in the middle. The span between uprights is too wide for the panel thickness at that position. Add a center support upright rather than loading less weight; the sag is structural, not a weight problem.
Gaps show between adjoining panels. The frame wasn't square before panels went in. Loosen the nearest joints, re-square using the diagonal measurement, and reinstall the panel before retightening.
Chrome tubes picked up scratches during the build. This happens from setting tools or connectors directly on bare tubes. Work on a moving blanket for the rest of the assembly and wipe tubes down with a microfiber cloth before final placement.
Tools and resources
- Hex key set (usually included with the hardware)
- 24-inch torpedo level
- Rubber mallet
- Tape measure and pencil
- Moving blanket for floor protection
- Office and home uses guide, for configuration ideas before you commit to a shelf-height layout
- How to verify quality before buying replica furniture — worth reading before assembly day if you're still comparing sources
What to do next
Once the frame is built and leveled, revisit module widths and bay counts against your actual wall measurements — the sizing and configuration guide referenced earlier covers exact grid spacing if you're planning a third bay later in 2026. Building one bay correctly now makes adding a second one, months down the line, a matter of matching the existing grid rather than starting over.
FAQ
How long does it take to assemble a USM Haller shelving replica?
A single-bay unit typically takes one focused session for two people; multi-bay configurations add time for squaring each shared upright. Rushing the squaring step is what turns a short build into a long one.
Do I need special tools to assemble a USM Haller shelving replica?
A hex key (usually included), a rubber mallet, and a level cover most builds. A tape measure helps confirm module spacing before final tightening.
Can one person assemble a USM Haller shelving replica alone?
A single narrow bay is manageable solo, but anything over roughly 30 inches wide is easier with a second person holding panels square while you seat connectors.
Why won’t my shelf panel snap into place?
The lipped edge of the panel only seats in one orientation. Flip the panel and check which edge has the lip before forcing it into the channel.
How do I know if my USM Haller-style frame is square?
Measure both diagonals of the base frame before standing it up. Equal measurements mean square; a difference over a quarter inch means a corner isn’t fully seated.
Should I tighten every joint fully before standing the frame up?
No — hand-tighten during assembly so you can adjust for square, then do a final tightening pass with the hex key once the whole unit is level.
Does a USM Haller shelving replica need to be anchored to the wall?
Units over roughly 40 inches tall carrying real weight should be anchored, especially if there’s a chance of a child or pet climbing the shelves. Leveling glides handle uneven flooring but don’t replace an anchor strap.
Can I add a second bay to a USM Haller shelving replica after the first is built?
Yes — the modular grid is designed for it. Match the existing bay’s module spacing and share the center upright rather than building the second bay as a fully separate unit.
One last thing
The detail people skip is the diagonal check in step two — it takes thirty seconds and it's the only step that catches a square frame versus one that will fight you for the rest of the build. Every other troubleshooting item on this page traces back to a frame that wasn't checked square before the panels went in.
Related guides
- How furniture scale changes in a room with high ceilings
- Sohnne — browse the full modular shelving and furniture catalog
Stay connected with us!
Keep in touch with what’s new and next. Subscribe for weekly insights, product launches, and community news!